

How Do I Access My Camera On My Mac
Permit Teams access to camera, microphone and screen sharing in macBone
For macOS Catalina ten.xv, Big Sur 11 or Monterey 12, Apple features additional security for cameras, microphones and screen sharing.
To check if you have one of these versions on your Mac, click theApple card in the peak-left corner, and so select About This Mac. The window identifies which macOS version you have.
If you take macOS Catalina Version 10.fifteen, Big Sur Version 11 or Monterey 12 then these instructions are for you.
If Microsoft Teams prompts you for access
Upon offset time use, Microsoft Teams may request admission to your camera, microphone and screen.
Follow these steps if prompted for photographic camera, microphone or screen sharing
- When sharing yourmicrophone and photographic camera in Teams for the first time, you lot may see these prompts.


Click OK in both prompts to grant admission to the microphone and camera.
- When attempting screen sharing in Teams for the first fourth dimension, you may meet these prompts.
From Microsoft Teams: "We demand permission to share your screen. Go to Security & Privacy > Screen Recording to give permission and first sharing."

From macOS:"Microsoft Teams would like to record this computer's screen."
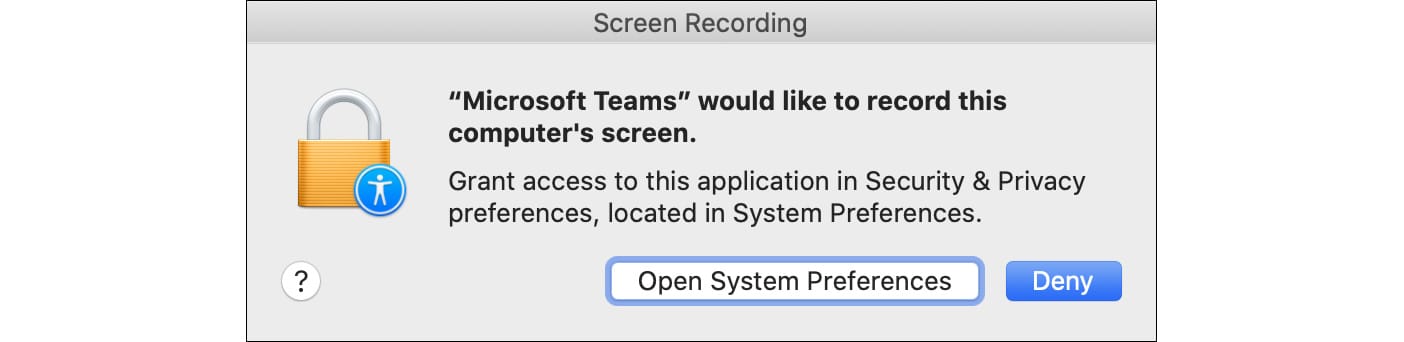
Click either the "Security & Privacy settings" button on the Teams prompt or the "Open System Preferences" push button on the macOS prompt.
-
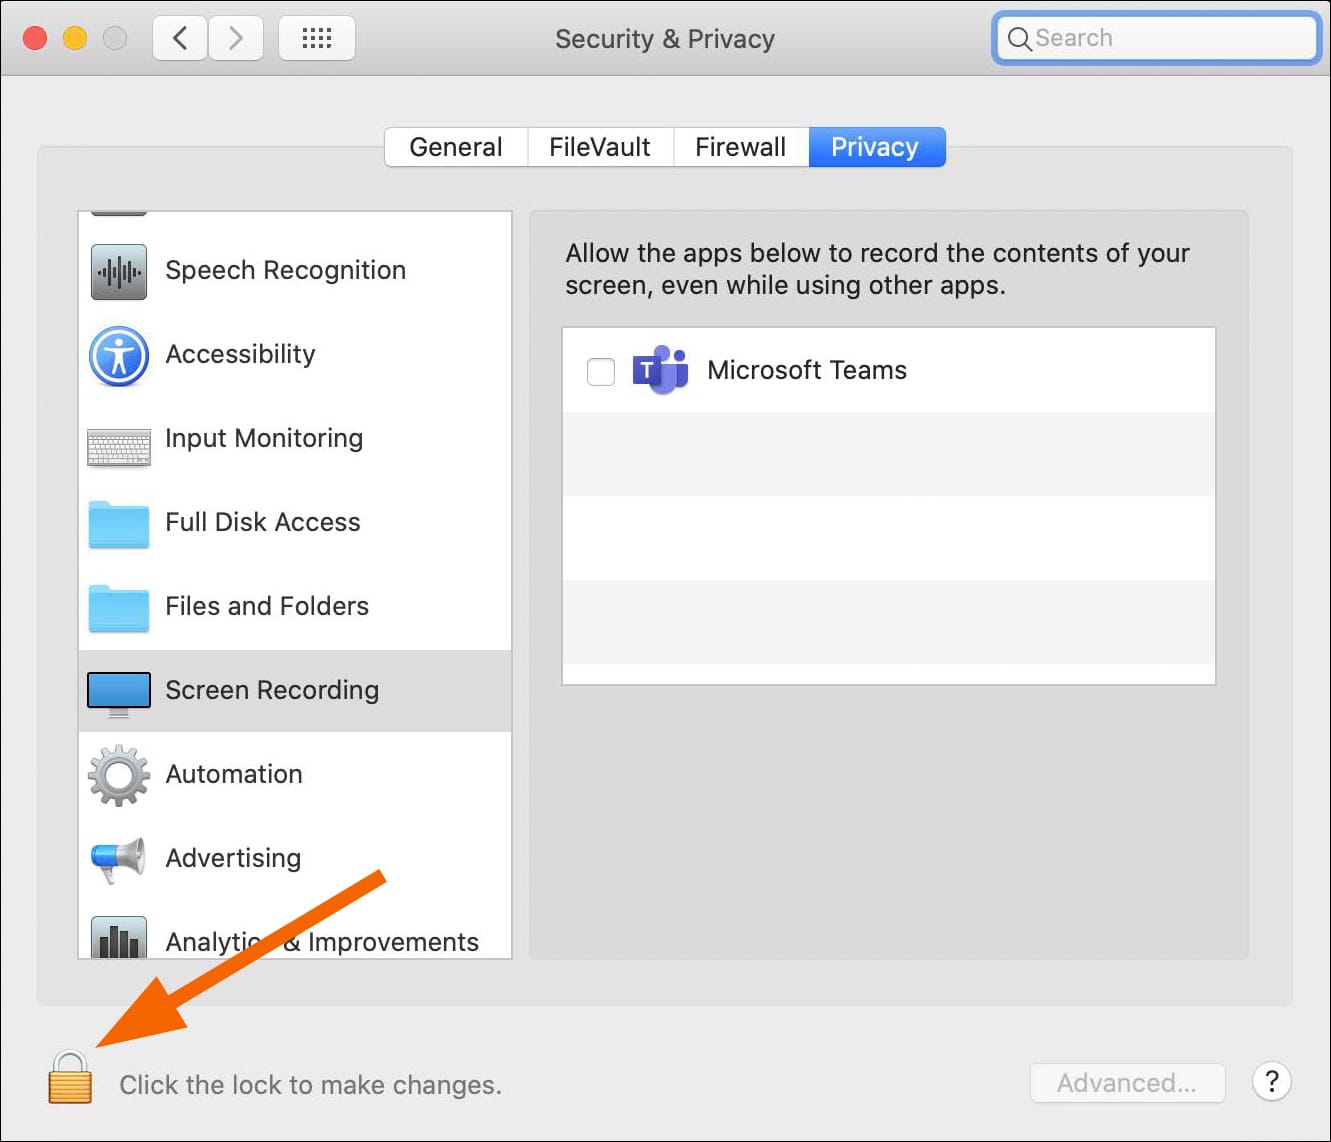
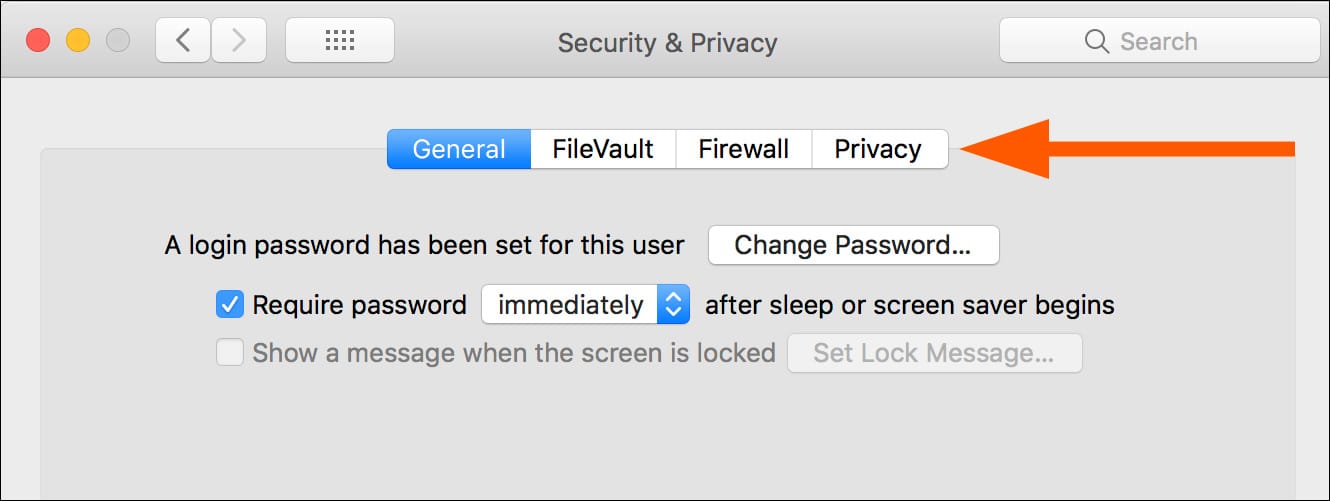
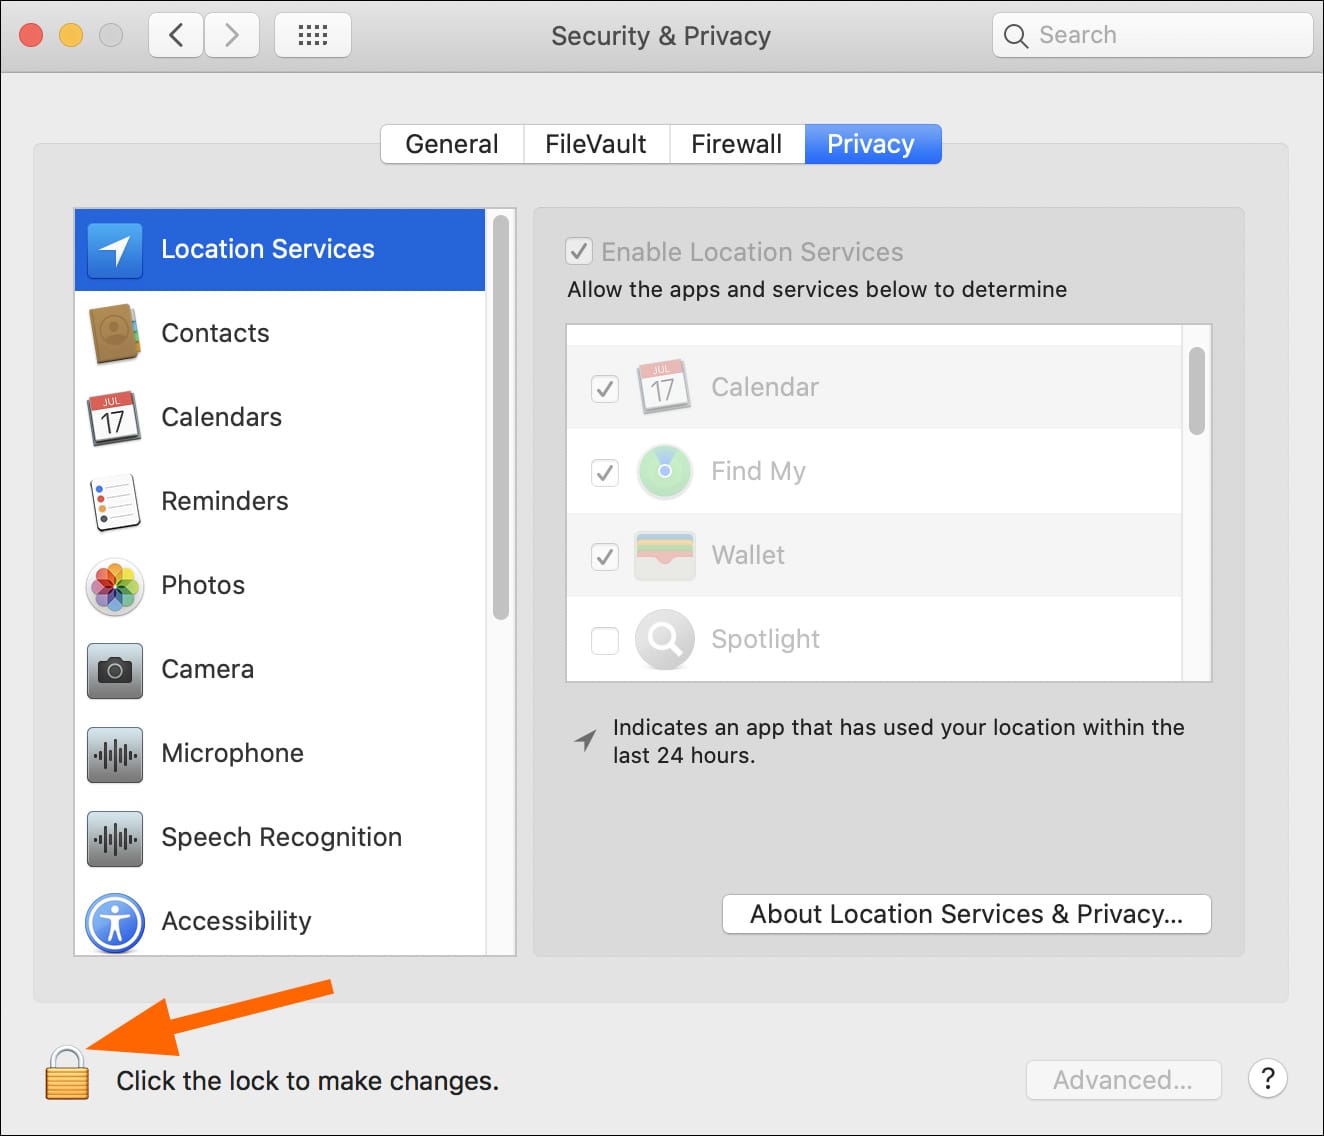
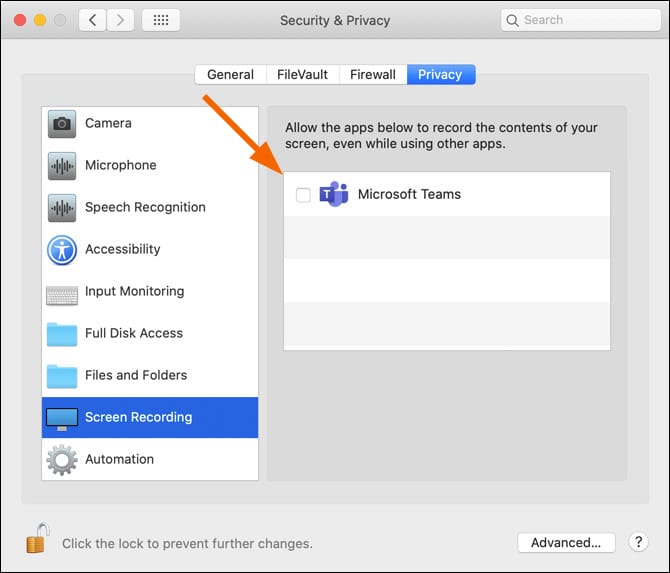
The Security & Privacy window opens. (You can likewise attain this window from Apple card > Organization Preferences. Then click Security & Privacy and then click Privacy tab.) In the lower left of the window, click the padlock icon to make changes. Enter your Mac's administrator username and password.
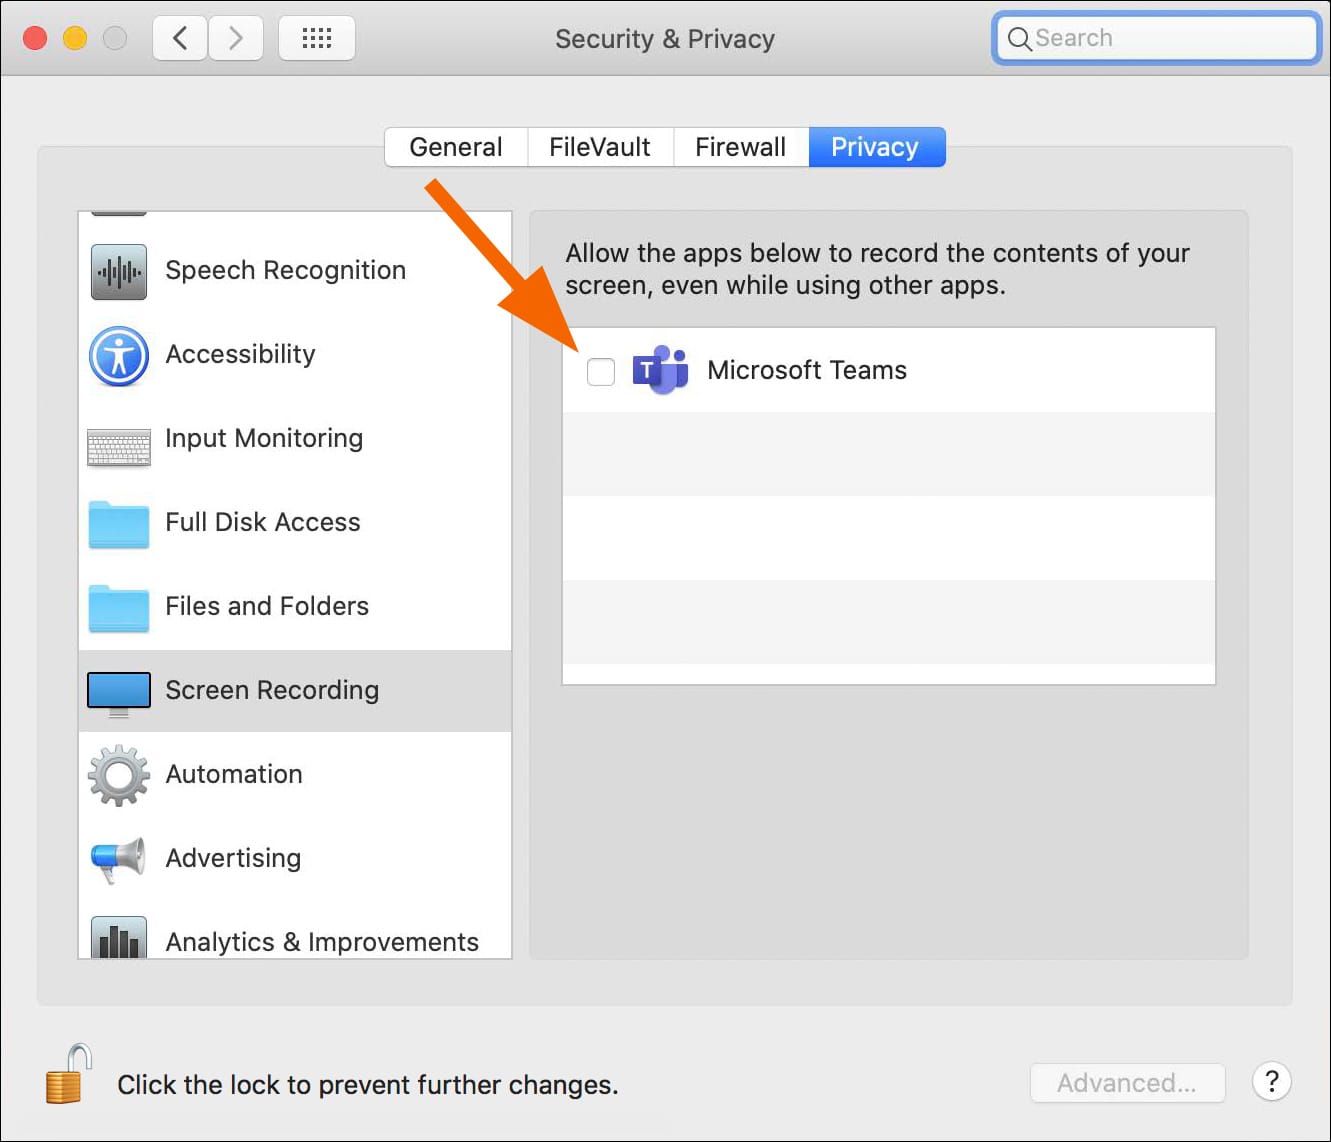
- The padlock unlocks and you can brand changes. Check the checkbox next to Microsoft Teams to allow screen sharing and capture.
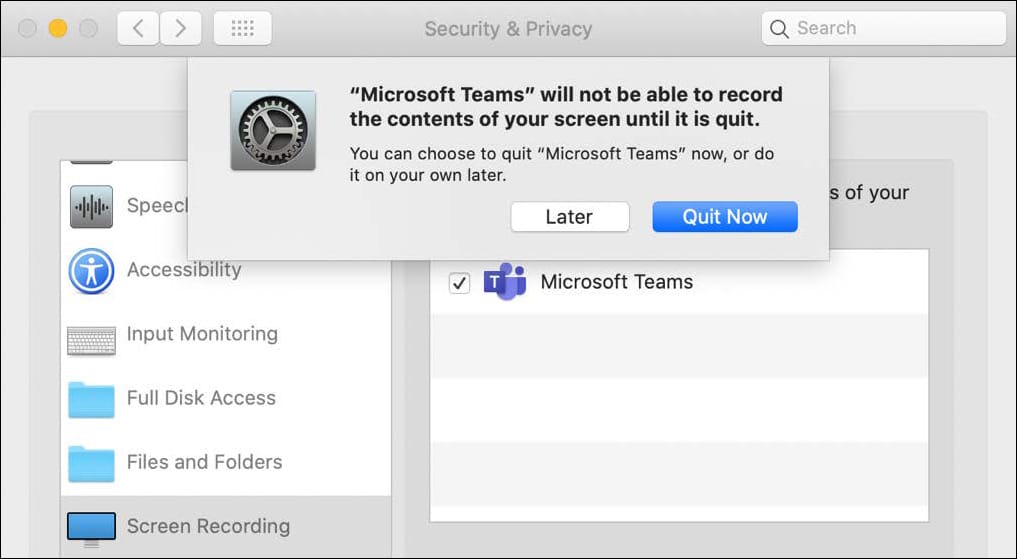
- You are prompted to quit Microsoft Teams and restart Teams to enact this change. If yous can quit Teams at present, select Quit At present.
- Close the Security & Privacy window. The adjacent time you launch Microsoft Teams, you lot volition accept access in identify to share and record your screen.
Trouble with Teams sharing your camera, microphone or screen?
Occasionally, neither Microsoft Teams nor macOS prompts to share your camera, microphone and screen. That means Teams cannot access the camera and microphone and cannot screen share. Without these permissions in identify, your Mac may show a spinning wheel in Teams. You can manually ready access by post-obit these steps.
- In the top-left corner of the Mac Desktop, clickApple menu and so select System Preferences.
- The System Preferences window appears. Click the Security & Privacy icon.

- The Security & Privacy window opens. Click thePrivacy tab.
- In the lower left of the window, click the padlock icon to make changes. Enter your Mac's administrator username and password.
- In the left column, click the Accessibility department. If Microsoft Teams is not listed on the right side, click the plus sign and add Microsoft Teams. Then cheque the Microsoft Teams checkbox.

-
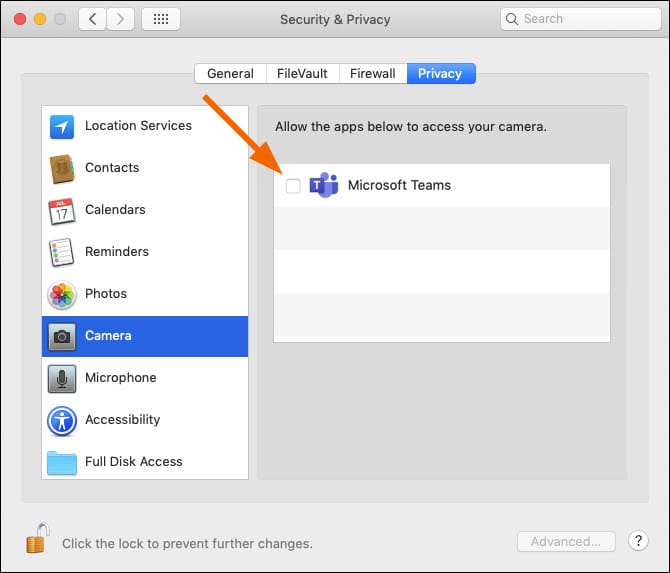
Click the Camera section. Check the Microsoft Teams checkbox.
-
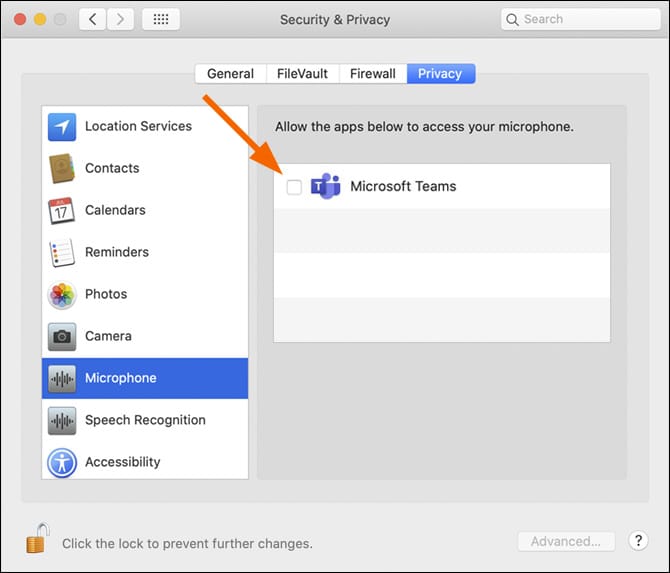
Click the Microphone section. Check the Microsoft Teams checkbox.
-
Click the Screen Recording section. Check the Microsoft Teams checkbox.
- Close the Security & Privacy window.
-
Quit Microsoft Teams and reopen Teams to enact these changes.
Questions?
Please contact the It Services Help Desk for questions about Microsoft Teams.
Source: https://www.marquette.edu/microsoft-teams/teams-macos-access.php
Posted by: williamsstalow.blogspot.com
0 Response to "How Do I Access My Camera On My Mac"
Post a Comment